
If you’re looking for a hearty, comforting dinner that’s packed with flavor, these tender oven-braised beef shanks are just what you need! Bone-in beef shanks are slowly cooked with fresh vegetables, aromatic herbs, and a flavorful tomato-based sauce until the meat becomes incredibly tender. The result is delicious, fall-apart beef surrounded by a rich, savory gravy that’s perfect for serving over mashed potatoes, rice, or your favorite side dish.

Why You’ll Love These Braised Beef Shanks
Incredibly tender beef: Cooking the beef shanks slowly at a low temperature allows this tougher cut of meat to become wonderfully tender.
Rich, flavorful gravy: Tomato paste, beef bouillon, soy sauce, fresh vegetables, and herbs come together to create a delicious savory gravy.
Simple ingredients: You don’t need anything fancy to make this comforting homemade dinner.
Mostly hands-off cooking: After the initial preparation, the oven does most of the work.
Perfect for family dinners: This hearty dish pairs beautifully with mashed potatoes, rice, and a variety of vegetables.
Even better the next day: The flavors continue to develop as the beef rests in its gravy, making leftovers especially delicious.
Watch How to Make This Recipe
Watch how I make this recipe step-by-step in the video above.
What Are Beef Shanks?
Beef shanks are cuts of meat taken from the leg of the cow. Because this area contains a considerable amount of connective tissue, beef shanks are naturally tougher than cuts such as rib-eye or sirloin.
However, that connective tissue is exactly what makes beef shanks ideal for braising.
When cooked slowly with moisture, much of the collagen in the connective tissue breaks down into gelatin, helping create tender meat and a rich, satisfying cooking liquid.
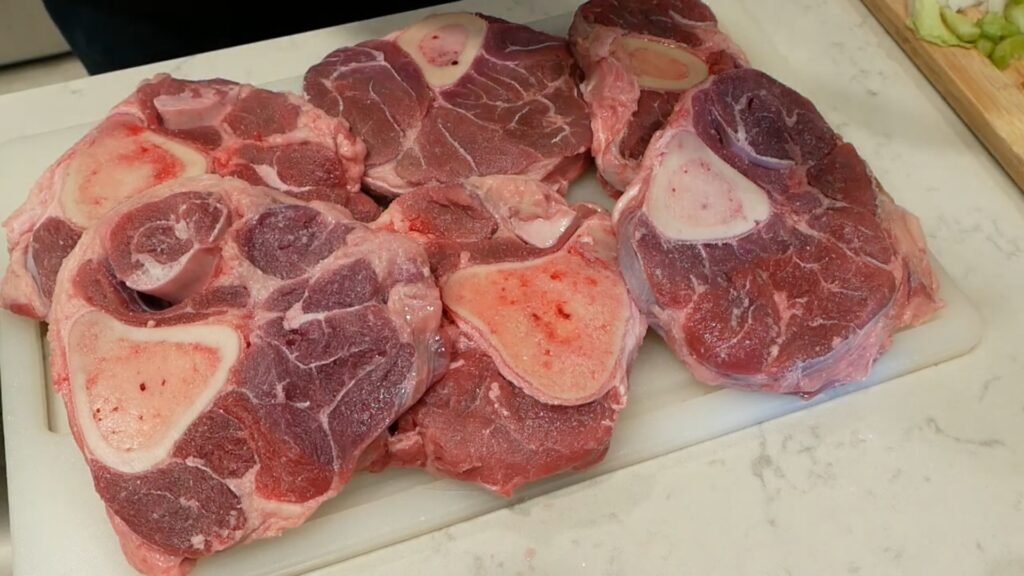
For this recipe, I’m using bone-in, center-cut beef shanks. The bones add flavor to the braising liquid, while the meat becomes tender during the long cooking process.
Braising is one of the best ways to transform this affordable, flavorful cut into a delicious homemade dinner.
Ingredients You’ll Need
One of my favorite things about this recipe is how simple ingredients come together to create such incredible flavor.
For the Beef Shanks
- 5 pounds bone-in, center-cut beef shanks: The star of this recipe. Bone-in shanks are ideal for slow braising.
- 1½ white onions, diced: Add sweetness and depth to the gravy as they cook.
- 2 celery ribs, diced: Provide an aromatic foundation for the braising liquid.
- 1 green bell pepper, diced: Adds a mild, savory flavor that complements the beef.
- 4 garlic cloves, minced: Fresh garlic brings another layer of flavor.
- 2 fresh rosemary sprigs: Add an earthy, aromatic flavor.
- 3 fresh thyme sprigs: Complement the beef and other seasonings.
- 1 (6-ounce) can tomato paste: Creates a rich tomato base for the gravy.
- 1½ tablespoons beef bouillon powder: Deepens the beef flavor.
- ½ tablespoon ground white pepper: Adds a warm, peppery flavor.
- ½ tablespoon ground cumin: Brings an earthy note to the dish.
- 1 tablespoon paprika: Adds color and enhances flavor.
- 2 tablespoons soy sauce: Adds savory depth and helps loosen the browned bits from the pot.
- 3 cups water: Creates the braising liquid.
- 3 tablespoons cooking oil: Used for searing the beef and sautéing the vegetables.
- Salt and black pepper, to taste: Used to lightly season the beef and adjust the finished gravy.


For the Cornstarch Slurry
- 2 tablespoons cornstarch
- ¼ cup cold water
The slurry helps transform the braising liquid into a thicker, smoother gravy. You can prepare additional slurry if you prefer an even thicker consistency.
How to Make Oven-Braised Beef Shanks
Although this recipe involves several steps, each one is straightforward. Taking a little time to develop flavor at the beginning makes a big difference in the finished dish.
Step 1: Preheat the Oven and Prepare the Vegetables
Begin by preheating your oven to 250°F.
Dice the white onions, celery, and green bell pepper into small, evenly sized pieces. Mince the garlic and set the vegetables aside.
Preparing everything before you begin cooking makes the process much easier, especially once you start searing the meat.

Step 2: Prepare and Season the Beef Shanks
Pat the beef shanks dry using paper towels.
Lightly season both sides with salt and black pepper.
Patting the meat dry is important because excess surface moisture can prevent the beef from developing a good sear.
You don’t need to heavily season the meat at this stage. The beef bouillon, soy sauce, vegetables, and herbs will add plenty of flavor during the braising process.

Step 3: Sear the Beef Shanks
Place a large, oven-safe Dutch oven or heavy-bottomed pot over medium-high heat.
Add approximately 3 tablespoons of cooking oil, or enough to lightly coat the bottom of the pot.
Once the oil is hot, carefully add the beef shanks.
Depending on the size of your pot, sear one or two pieces at a time. Avoid overcrowding the pot because doing so can cause the meat to steam rather than brown.
Allow the beef to develop a nicely browned crust on one side before turning it over and searing the other side.
Remember, you’re not trying to cook the meat all the way through. The purpose of this step is to develop flavor.
Once all the beef shanks have been seared, transfer them to a plate and set aside.
Don’t worry about the browned bits left at the bottom of the pot. Those flavorful bits will help create a delicious gravy.

Step 4: Sauté the Vegetables
Using the same pot, add the diced onions, celery, and green bell pepper.
Cook over medium heat, stirring occasionally, until the onions become translucent and the vegetables begin to soften.
Add the minced garlic and stir it into the vegetables.
The vegetables will pick up some of the flavor left behind from searing the beef.
This step helps build the foundation of the gravy.

Step 5: Add the Seasonings
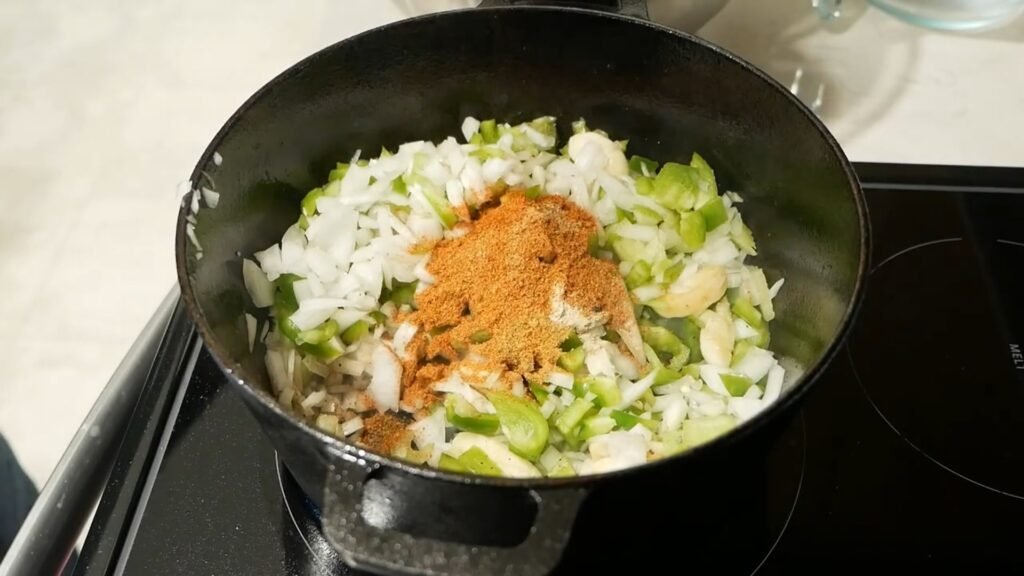
Add the beef bouillon powder, white pepper, paprika and ground cumin to the vegetables.
Stir everything together until the seasonings are evenly distributed.
Allow the seasonings to cook with the vegetables for approximately 1 minute.
This gives the seasonings a chance to become fragrant and blend with the other ingredients.
Step 6: Add Soy Sauce and Deglaze the Pot
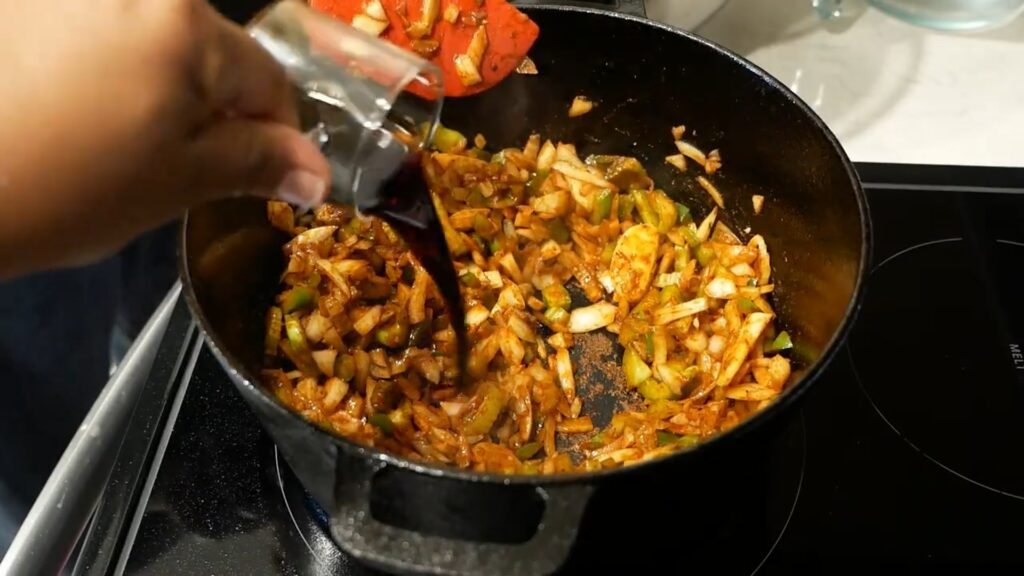
Pour the soy sauce into the pot.
Using a wooden spoon or spatula, stir the vegetables while gently scraping the bottom of the pot to loosen any browned bits.
These browned bits contain concentrated flavor from the seared beef and will add richness to the gravy.
Step 7: Cook the Tomato Paste
Push the vegetables toward the sides of the pot, creating a small opening in the center.
Add the entire 6-ounce can of tomato paste directly to the exposed surface of the pot.
Allow the tomato paste to cook for approximately 2–3 minutes, stirring it against the bottom of the pot to prevent burning.
Cooking the tomato paste helps deepen its flavor and reduces some of its raw, acidic taste.
Once the tomato paste has cooked, stir it into the vegetables until everything is well combined.

Step 8: Add the Water
Pour 3 cups of water into the pot.
Stir thoroughly, making sure the tomato paste and seasonings are incorporated into the liquid.
Scrape the bottom of the pot again to release any remaining flavorful bits.
The liquid should develop a rich, reddish-brown color.
This will become the flavorful braising liquid for the beef shanks.

Step 9: Return the Beef to the Pot
Carefully transfer the seared beef shanks back into the pot, along with any juices that have collected on the plate.
Arrange the meat as evenly as possible.
Add the fresh rosemary and thyme sprigs.
The beef does not need to be completely submerged, but it should sit in the braising liquid so the meat can cook gently in the moist, covered environment.


Step 10: Cover and Braise in the Oven
Cover the Dutch oven with a tight-fitting lid.
Carefully transfer the pot to the preheated 250°F oven.
Allow the beef shanks to braise for 4 hours.
During this time, the meat will slowly become tender as the connective tissue breaks down.
The low oven temperature allows the beef to cook gently while absorbing the flavors of the vegetables, herbs, and seasonings.
Avoid repeatedly removing the lid, as doing so releases heat and moisture.

Step 11: Remove the Beef and Debone, If Desired
After 4 hours, carefully remove the pot from the oven.
Remove the lid, being mindful of the hot steam.
Using tongs or a large spoon, gently transfer the beef shanks to a plate.
At this point, the meat should be noticeably more tender.
If desired, carefully remove the bones from the beef.
You can leave the meat in large pieces or separate it into smaller portions, depending on how you prefer to serve it.
Deboning is completely optional. If you enjoy serving the beef shanks with the bones intact, you can leave them as they are.

Step 12: Prepare and Add the Cornstarch Slurry
In a small bowl, combine:
- 2 tablespoons cornstarch
- ¼ cup cold water
Stir until the cornstarch is completely dissolved and the mixture is smooth.
Remove the rosemary and thyme stems from the gravy if desired.
Bring the braising liquid to a gentle simmer on the stovetop.
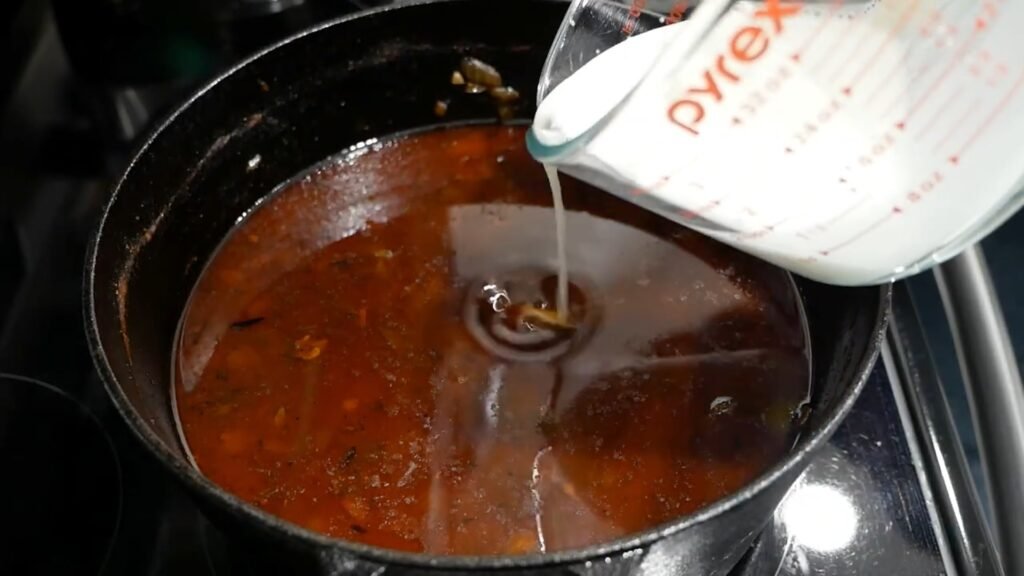
While stirring continuously, gradually pour the cornstarch slurry into the hot liquid.
Continue stirring and allow the gravy to simmer briefly until it begins to thicken.
If you prefer a thicker gravy, prepare a little additional cornstarch slurry and add it gradually until you reach your desired consistency.
Keep in mind that the gravy will continue to thicken slightly as it cools.
Step 13: Return the Beef to the Oven
Carefully return the beef to the pot, nestling it into the gravy.
Cover with the lid and place the pot back into the oven at 250°F.
Continue braising until the beef is very tender and can be easily separated with a fork.
The additional cooking time will depend on the thickness of the beef shanks and how tender they became during the initial four hours.
Once the meat reaches your desired tenderness, remove the pot from the oven.
Taste the gravy and adjust the salt and pepper if needed.

Step 14: Serve and Enjoy!
Your tender oven-braised beef shanks are ready to enjoy!
Spoon the beef onto a serving plate and generously ladle the rich, savory gravy over the top.
Serve with creamy mashed potatoes, fluffy white rice, or your favorite homemade side dishes.
Enjoy!

Tips for Making the Best Oven-Braised Beef Shanks
Don’t Skip Searing the Meat
Searing is one of the most important steps in developing flavor.
Allowing the beef to brown creates a deeper, richer taste that carries through to the finished gravy.
Avoid Overcrowding the Pot
Sear the beef in batches if necessary.
Leaving space between the pieces helps them brown properly rather than steam.
Cook the Tomato Paste
Giving the tomato paste a few minutes to cook before adding the water helps develop a richer flavor.
Just be sure to stir it so it doesn’t burn.
Keep the Oven Temperature Low
Braising beef shanks requires patience.
Cooking at 250°F allows the meat to become tender gradually without exposing it to unnecessarily high heat.
Don’t Rush the Cooking Time
Four hours is the initial braising period for this recipe, but some beef shanks may need additional time.
The meat is ready when it is very tender and separates easily with a fork.
If it still feels tough, it usually needs more time.
Adjust the Gravy to Your Preference
The cornstarch slurry helps create a delicious gravy.
If you prefer a thicker consistency, add a little more slurry.
If the gravy becomes too thick, stir in a small amount of water until it reaches your desired consistency.
Taste Before Adding More Salt
Because the recipe contains beef bouillon and soy sauce, the braising liquid already has ingredients that contribute saltiness.
Taste the finished gravy before adding additional salt.
What to Serve with Braised Beef Shanks
These tender beef shanks pair beautifully with simple side dishes that complement the rich gravy.
Creamy mashed potatoes: One of my favorite ways to enjoy a rich beef gravy. The potatoes soak up all that delicious flavor.
Steamed white rice: A simple, comforting option that’s perfect for spooning the beef and gravy over.
Southern-style collard greens: A flavorful vegetable side that pairs nicely with this hearty dinner.
Green beans: A lighter side dish that helps balance the richness of the beef.
Buttered egg noodles: Another delicious way to enjoy every bit of the savory gravy.
Homemade dinner rolls: Perfect for soaking up the extra gravy left on your plate.
Frequently Asked Questions
What is the best cooking method for beef shanks?
Braising is one of the best methods for cooking beef shanks because it uses low heat, moisture, and time to soften the connective tissue.
This produces tender meat and a flavorful cooking liquid.
Why are my beef shanks still tough?
If your beef shanks are still tough after several hours, they may simply need more cooking time.
Beef shanks contain a significant amount of connective tissue that takes time to break down.
Continue cooking them gently until they become fork-tender.
Do beef shanks need to be completely covered in liquid?
No. When braising, the meat does not need to be completely submerged.
The combination of liquid, gentle heat, and a tightly covered pot creates a moist cooking environment.
However, it’s important to make sure the pot doesn’t run dry during cooking.
How to Store and Reheat Oven-Braised Beef Shanks
Refrigerating
Allow the beef shanks and gravy to cool slightly before transferring them to airtight containers.
Refrigerate promptly and store for up to 3–4 days.
Keeping the meat in the gravy helps prevent it from drying out.
Freezing
Braised beef shanks freeze well.
Transfer the cooled beef and gravy to freezer-safe containers, leaving room for expansion.
For best quality, enjoy within approximately 2–3 months.
Thaw overnight in the refrigerator before reheating.
Reheating
Place the beef and gravy in a covered saucepan or pot over low to medium-low heat.
Add a splash of water if the gravy has thickened too much during storage.
Heat gently, stirring occasionally, until the beef is thoroughly heated to 165°F.
Avoid boiling the meat aggressively, as this may affect its texture.
Tender Oven-Braised Beef Shanks with Rich Gravy
Ingredients
Method
- Preheat the oven. Preheat your oven to 250°F. Dice the onions, celery, and bell pepper, and mince the garlic.
- Prepare the beef. Pat the beef shanks dry with paper towels and lightly season both sides with salt and black pepper.
- Sear the beef. Heat the cooking oil in a large Dutch oven over medium-high heat. Sear the beef shanks in batches, browning both sides without overcrowding the pot. Transfer to a plate and set aside.
- Cook the vegetables. In the same pot, add the diced onions, celery, and green bell pepper. Cook until the onions become translucent. Add the minced garlic and stir to combine.
- Add the seasonings. Stir in the beef bouillon powder, white pepper, and ground cumin. Cook for approximately 1 minute.
- Deglaze the pot. Add the soy sauce and stir, scraping up the browned bits from the bottom of the pot.
- Cook the tomato paste. Push the vegetables aside to create a well in the center of the pot. Add the tomato paste and cook for 2–3 minutes, stirring to prevent burning. Mix the tomato paste into the vegetables.
- Add the water. Pour in 3 cups of water and stir until the tomato paste and seasonings are thoroughly incorporated.
- Return the beef. Place the seared beef shanks and any accumulated juices back into the pot. Add the rosemary and thyme sprigs.
- Braise the beef. Cover with a tight-fitting lid and transfer to the preheated oven. Braise at 250°F for 4 hours.
- Remove and debone. Carefully remove the pot from the oven and transfer the beef shanks to a plate. Remove the bones if desired.
- Thicken the gravy. Combine 2 tablespoons cornstarch with ¼ cup cold water. Bring the braising liquid to a gentle simmer on the stovetop, then gradually stir in the slurry. Simmer briefly until thickened. Add more slurry if a thicker gravy is desired.
- Finish braising. Return the beef to the pot, cover, and place back into the 250°F oven. Continue braising until the meat is very tender and separates easily with a fork.
- Serve. Taste the gravy and adjust the seasonings if necessary. Serve the beef shanks with plenty of gravy over mashed potatoes, rice, or your favorite side dish.
Video
Notes
- Sear the beef shanks in batches for the best browning.
- Bone-in beef shanks provide excellent flavor, but the bones can be removed after the initial braise.
- The initial braising time is 4 hours. Continue cooking afterward until the beef is fork-tender.
- Add additional cornstarch slurry gradually if you prefer a thicker gravy.
- Taste the gravy before adding extra salt because the bouillon and soy sauce already contain sodium.
- Refrigerate leftovers in airtight containers for up to 3–4 days.
More Recipes to Try
If you enjoyed these tender oven-braised beef shanks, here are a few more recipes you might love:

Did you make these braised beef shanks recipe? Leave a star rating and let me know how they turned out!